How To Lay Paving Slabs - Our Quick Guide
Although there are hundreds of different types of stone and porcelain used for paving and hard-landscaping, when it comes to installation, we can roughly divide them into two groups: the more porous sandstones and limestones which have little or no difficulty in adhering to the bed, and the less porous, possibly impermeable porcelain, granites and slates which need a bond bridge to ensure they stick to the bed and won’t be loosened by use, frost or water.
All residential paving projects will consist of at least three layers. The materials used to form each layer, and the depth of each layer will change according to how the paving is being used.
The lowest level is the sub-base. This is the load-bearing layer, the one that gives a patio or driveway its strength. It usually consists of a 100mm deep layer of crushed aggregate known as ‘Type 1’ which is thoroughly compacted using a vibrating plate compactor (or possibly a mechanical roller on larger projects).
The Type 1 aggregate is spread out and levelled using shovels and rakes to achieve an even grade with enough of a slope to ensure the paving will drain when laid. The aim is to create a solid, reliable platform which will have a uniform depth of bedding placed over it, so check levels as work progresses to ensure the bed will be consistently 25-40mm in depth.
Driveways often use 150mm depth for the sub-base, and it may be laid over a geo-textile to keep it separate from the ground beneath. Some driveways, especially those carrying larger cars, 4x4s and the like, or built using setts or cubes, might replace the Type 1 with a lean-mix concrete for even greater strength.
Above the sub-base comes the laying course, more commonly knowns as the bedding. For most projects, this will be a sand/cement mortar, but there are a small number of circumstances where a sand-only or grit bed could be used. Mortar used for bedding paving is typically mixed using 6 parts of a sharp sand with 1 part cement. It can be mixed to different degrees of ‘wetness’ but for most projects a ‘moist mix’ is the best choice. This means adding just enough water (and plasticiser to make it pliable) to bind together the sand and cement without it being sloppy The mortar is spread out using a trowel, covering the sub-base and ensuring that it will provide a full bed for the eventual paving. This means no gaps, no voids, no hollows, no ‘spots’ or ‘dabs’ of mortar, but a full and even bed which will provide full and uniform support to the paving. The top of the mortar is usually lightly rippled to ensure there is some ‘give’ when the flag is placed in position.
The final layer is the paving itself, which might be flags, setts, cubes, kerbs or cobbles. These are pressed down onto the bed mortar, and then tapped down to the required level using a rubber hammer, and then checked with a spirit level. When a porous type of stone is being laid, the paving units can usually be laid directly onto the bedding, but when the paving is less porous, the underside should be painted with a bond bridge of liquid SBR or SBR-with-cement. With porcelain paving we recommend to use a porcelain primer.
Make sure the paving is laid the correct way up. It can be easy to think that flags or setts can be laid either way up, but this isn’t correct. Each piece has been selected to have a definite ‘face’ and a ‘base’. The base is nearly always smaller than the face, so the edges of the flag or sett typically taper inwards towards the base. You should also be able to spot that the arises, the edges of the upper face, are much more neatly trimmed than those of the base.
Don’t forget that paving has to drain. This is most commonly achieved by sloping it in one direction or another towards a lawn, a flowerbed, a gully or a linear channel. Generally speaking, a lope of 1:60 (17mm per metre) will be enough to ensure water doesn’t hang about on the surface but not so much that you feel as though you’re falling over.
It’s often a good idea to use thicker paving units for driveways. The heavier loads imposed by cars, plus the turning forces they generate when manoeuvring, can prove too much for ‘standard’ patio flags. Think about using one of the thicker flagstones (regular) stocked by Landscape World especially for driveways, or even consider using setts or cubes. You may also need a concrete base as well as a sub-base.
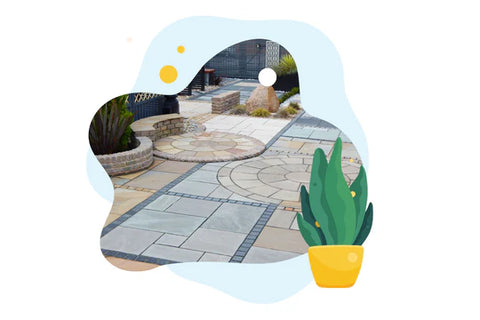
Sometimes, including a circle feature can enhance a larger patio area or courtyard. And for some gardens, a circle on its own provides the perfect solution for a table and chairs, or even to carry a feature such as a fountain, bird feeder or statue. Landscape World offer a wide range of circles in various types of stone, in a generous range of colours.
The key to successfully laying a circle is to start in the centre and work outwards. Think about how it will drain: a standalone circle might need to be higher in the centre than at the outside edge, while circles set within larger paved areas should have the same fall as the surrounding paving.
Use a moist mortar for the bed and place each segment in a ring before tapping them down to final level, as they might needed to be shifted a little one way or another to give a regularly-spaced and even-looking ring. Complete each ring before moving on to the next.
Although setts are most commonly used to create paved areas in their own right, they are a great way of spicing-up an area of flags. Use them to create a perimeter border, or to form break bands diving up larger areas. They can also look fantastic when used to replace a whole flag within a patio or driveway, as they offer a contrasting texture and, possibly, a contrasting colour. Clever use of setts as detailing gives a completed project that sense of style which shows someone has thought about it, rather than just plonking down flag after flag after flag.
Setts, as well as cubes and cobbles, really need to be bedded into mortar, in more-or-less the same way as flags. Use a moist mix of mortar, and a bond bridge will help ensure these smaller units stay put. Don’t forget that even small paving units need to have a fall to ensure water drains off the surface.
Once you have the paving laid, it needs to be jointed. There are numerous products that can be used to fill the gaps between individual flags or setts, but the two most commonly used are a sand/cement mortar or a polymeric sand, which uses a resin to bind together the individual grains and ‘glue’ them to the edges of the paving.
Sand/cement mortar is cheap, but it can be messy unless you’re proficient with a trowel. Cement can stain natural stone and it can be tricky to remove. It needs the paving to be dry, and to remain dry for at least the first 24 hours. In contrast, a polymeric sand, such as ProJoint, is simplicity itself, even if they are slightly more pricey. The ready-formulated sand is emptied from its package and swept into the empty joints of the wetted paving with a soft brush. Any excess swept off, and the ‘sand’ cures over the next few hours to give a firm and clean joint. Used properly, polymeric sands can’t stain the paving, so they remove the risk of spoiling the paving at this final stage.
Be aware that stone is a totally natural product and that the gentle variation in colour, texture, mineral banding, ‘fossils’ and thickness that is found in almost every pack is all part of the charm. When working with more than a single pack, take flags (or setts, cubes, etc.) from a number of packs and mix them randomly to ensure that natural variation is evenly distributed. This not only enhances the appearance of the stone showing each piece to be unique and full of character, but it avoids the problem of ‘clumping’ where flags (setts, etc.) or a similar hue appear together giving the finished project a blotchy look.
Outdoor porcelain tiles may have slight size variations due to the manufacturing process. These variations are typically within acceptable industry standards of 2mm+/-. The colour and texture of outdoor porcelain tiles can vary slightly between different batches or production runs. These differences are inherent to the manufacturing process and should be expected. Large format porcelain tiles may have a bow in them. This occurs due to the high temperature during the manufacturing process.


